Posts

Showing posts from October, 2013

What did I learn from Hack Jam Saigon the First?

Image
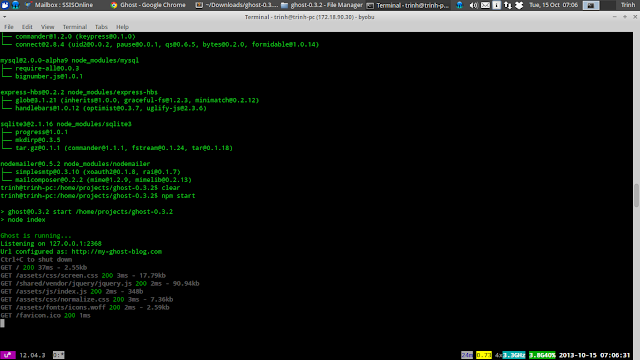
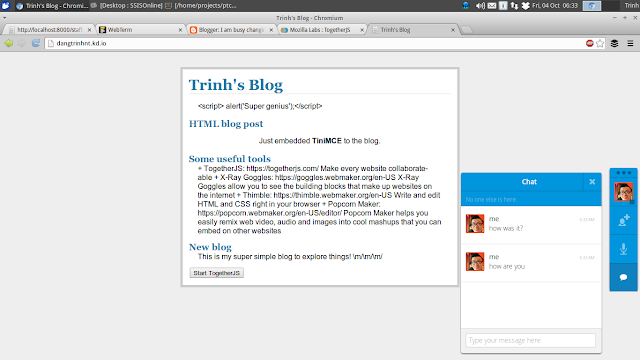
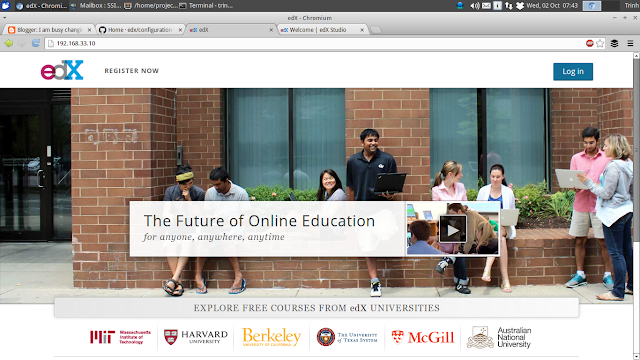
Last Sunday (31 October 2013), I hosted a Hack Jam, the first Hack Jam in Ho Chi Minh City. It didn't happen as I had planed. But, there were a lot of things I've learned. We had snacks, we had water...I though we had everything we needed. But "life is not always as you expected". A lot of mistakes, a lot of wrong things. Among all of these "bugs", these are 2 important things that failed the event: 1. The Internet Connection: The biggest problem was the poor Internet connection. It's just too slow when 10 persons tried to connect to the wi-fi. I intended to introduce some great tools such as: + TogetherJS : transform your website into a collaborative environment + Thimble : an online HTML editor + Popcorn : an online media builder + Modpad : a collaborative notes taking tool based on Etherpad We could only see through some of the tools. And that's all. Hopefully, the hackers were somehow amazed by the usefulness of those applications.

Django - When should we use Function-based and Class-based views?

Image
This flowchart explains when we use Function-based views and when we should use Class-based views instead: (source: Two Scoops of Django by Daniel Greenfeld and Audrey Roy)

How to install wxPython inside a virtualenv environment

python-pip does not contain wxPython module. So, to use it inside an virtualenv environment (e.g.: /home/.venv/myenv/): 1. Install it system-wide: $ sudo apt-get install python-wxgtk2.8 2. Make a symbolic link of wxPython to the virtualenv: $ ln -s /usr/lib/python2.7/site-packages/wx* /home/.venv/myenv/lib/python2.7/site-packages/ Update: In xUbuntu 12.04: $ ln -s /usr/lib/python2.7/dist-packages/wx* /home/.venv/myenv/lib/python2.7/site-packages/

Migrate all my Django projects to v1.5.5

It is really great when accomplishing something. To me, It's migrate all my Django projects to the latest stable version of Django (1.5.5, when I write this blog post). There are something I want to take notes: 1. Replace/remove all the obsoleted methods, functions , especially the generic views . The function based generic views are replaced completely by the class based views in Django 1.5. For example: # from django.views.generic.list_detail import object_list # from django.views.generic.create_update import create_object (Function-based generic views such as direct_to_template and object_list were deprecated in Django 1.3 and removed in 1.5.) For more information about class based views and how to migrate from function based views: + https://docs.djangoproject.com/en/1.3/topics/generic-views-migration/ + https://docs.djangoproject.com/en/1.5/topics/class-based-views/generic-display/ 2. Replace/remove settings keywords, and add new required ones . Something lik

LDAP - Migrate the current LDAP Database to a new domain

Here is how I migrated the current LDAP database to a new domain: * Export the old LDAP database to ldif file. * Delete the old databaes * Create a new LDAP database with new domain name * Modify the exported ldif file above to fit the new domain (the root dn) * Import the modified ldif file into the new database Assuming I have a new domain name: dc=my,dc=new,dc=ldap,dc=domain And I want to move all of the existing LDAP data to the new one. I did the following steps: 0. Backup the old LDAP database: # slapcat -v -l old_ldap.ldif 1. Stop the OpenLDAP server: # service slapd stop 2. Delete old LDAP database: # cd /var/lib/ldap # rm -rf *    3. Make sure LDAP is not running: # nano /var/lib/ldap/DB_CONFIG add these following line and save: #DB_CONFIG set_cachesize 0 150000000 1 set_lg_regionmax 262144 set_lg_bsize 2097152 set_flags DB_LOG_AUTOREMOVE 4. Change the current LDAP settings: + /e

Debian - How to fix Perl warning about locales

When I restarted the lighttpd service, the console raised this warning: perl: warning: Setting locale failed. perl: warning: Please check that your locale settings: LANGUAGE = (unset), LC_ALL = (unset), LC_CTYPE = "UTF-8", LANG = "en_GB.UTF-8" are supported and installed on your system. perl: warning: Falling back to the standard locale ("C"). It is because the locales settings of the system was not configured properly. So, to fix this, run the following command: # dpkg-reconfigure locales And choose the correct locale file, in my case, it is "en_US.UTF-8".

Ubuntu - List recently installed packages

To list recently installed packages in Ubuntu: * Via any method: $ cat /var/log/dpkg.log | grep "\ install\ " * Via apt-get (NOTE: this doesn't list dependencies installed, it simply lists previous apt-get commands that were run): $ cat /var/log/apt/history.log | grep "\ install\ "

Heroku - Error when installing heroku-toolbelt in Xubuntu 12.04

One of the first thing I have to do when starting working with heroku is to install Heroku Toolbelt at  https://toolbelt.heroku.com/debian . But, when I ran the command: wget -qO- https://toolbelt.heroku.com/install-ubuntu.sh | sh  It raised an error: Failed to fetch http://toolbelt.heroku.com/ubuntu/./foreman-0.60.0.deb  Size mismatch E: Unable to fetch some archives, maybe run apt-get update or try with --fix-missing? I'm running on a Xubuntu 12.04 machine. I've looked around the Internet and found some solutions but It did not work at all.  I took a look at the script ( https://toolbelt.heroku.com/install-ubuntu.sh ): echo "This script requires superuser access to install apt packages." echo "You will be prompted for your password by sudo." # clear any previous sudo permission sudo -k # run inside sudo sudo sh <<SCRIPT # add heroku repository to apt echo "deb http://toolbelt.heroku.com/ubuntu ./" > /etc/apt

SSH tunnelling through a SockProxy with Tor

Your company network does not allow any SSH connection? Just make it through a Sock Proxy. You can easily ssh successfully to your server with Tor. 1. Install Tor: $ sudo apt-get install tor After installing Tor, some services will be started: tcp        0      0 127.0.0.1:9050          0.0.0.0:*               LISTEN      14753/tor       tcp        0      0 127.0.0.1:9150          0.0.0.0:*               LISTEN      7373/tor       tcp        0      0 127.0.0.1:9151          0.0.0.0:*               LISTEN      7373/tor     2. SSH through Tor network: $ torify ssh root@myoutsidedomain.com Cool!!! References: [0]  https://trac.torproject.org/projects/tor/wiki/doc/TorifyHOWTO/Misc#SSH [1]  https://trac.torproject.org/projects/tor/wiki/doc/TorifyHOWTO/ssh

Django - Subclass the default AuthenticationForm

Image
I can use the default Django AuthenticationForm (or any Django's built-in forms), it's enough in most cases. But, for some reasons, I want to add style for the login form. So, I use the following method to add "class" and "placeholder" attributes for username and password inputs: 1. Create .../myapp/ forms.py : from django import forms from django.contrib.auth.forms import AuthenticationForm class MyAuthenticationForm(AuthenticationForm): def __init__(self, *args, **kwargs): super(MyAuthenticationForm, self).__init__(*args, **kwargs) self.base_fields['username'].widget.attrs['class'] = 'form-control' self.base_fields['username'].widget.attrs['placeholder'] = 'Username' self.base_fields['password'].widget.attrs['class'] = 'form-control' self.base_fields['password'].widget.attrs['placeholder'] = 'Password' 2. Modify the urls.py : from

Django - To install django-toolbelt successfully

Before installing django-toolbelt you have to install those following dependencies: $ sudo apt-get install python-dev python-psycopg2 libpq-dev And then in the virtualenv: (myven)trinh@trinh-pc:/path/to/django/project$ pip install django-toolbelt

PostgreSQL - Getting started

Here are some steps to getting started with PostgreSQL : 0. Install PostgreSQL: $ sudo apt-get update $ sudo apt-get install postgresql postgresql-contrib Note: you also need to change password of the database superuser (postgres) created when installing postgres: $ sudo passwd postgres 1. Create a Linux user, myuser : $ sudo adduser myuser (This will prompt you to enter password for this user.) 2. Login as database superuser, postgres : $ su - postgres 3. Connect to the database server: postgres@trinh-pc:~$ psql template1 4. In the Postgres console, create database user name myuser : psql (9.1.9) Type "help" for help. template1=# CREATE USER myuser WITH PASSWORD 'mypassword'; 5. Create database name mydb : template1=# CREATE DATABASE mydb; 6. Grant all privileges on mydb to myuser : template1=# GRANT ALL PRIVILEGES ON DATABASE mydb TO myuser; 7. Test user myuser login: trinh@trinh-pc:~$ su - myuser myuser@trinh-pc

Django + Heroku - To avoid error when deploying

As the previous blog post, I posted a setting snippet to let Django know where the db is (local and in Heroku):  http://iambusychangingtheworld.blogspot.com/2013/10/django-heroku-local-and-heroku-database.html Today, I found someone has create another snippet which is much more clever and useful: Deploying Django to Heroku (Psycopg2 Error) heroku run python manage.py syncdb psycopg2.OperationalError: could not connect to server: Connection refused Is the server running on host "localhost" and accepting TCP/IP connections on port 5432? heroku addons:add shared-database:5mb import sys import urlparse import os # Register database schemes in URLs. urlparse.uses_netloc.append('postgres') urlparse.uses_netloc.append('mysql') try: # Check to make sure DATABASES is set in settings.py file. # If not default to {} if 'DATABASES' not in locals(): DATABASES = {} if 'DATABASE_URL' in os.environ: url = urlpar

Think Big Anyway

Image
"The biggest men and women with the biggest ideas can be shot down by the smallest men and women with the smallest minds.  Think big anyway ." ~"The Paradoxical Commandments" by Kent M. Keith (source:  http://kevinelworthlive.com/?p=1399 )

Ghost - A new blogging platform

Image
A new blogging platform has been launched yesterday, Ghost. http://ghost.org/ Because It runs on nodejs, I am not surprised when Its performance, speed is pretty good. Installation, configuration are so easy. And what I like most is its design. It is just so beautiful and simple. With a little changes in the config.js file I can have a fully functional blog (development mode): ... config = {     // ### Development **(default)**     development: {         url: 'http://localhost:2368',         mail: {               transport: 'SMTP',               options: {                   service: 'GMail',                   auth: {                       user: 'myemail@gmail.com',                        pass: 'myPwd'                    }               }           },         //``` ... Start the blog in development mode by running the following command: trinh@trinh-pc:/path/to/ghost$ npm start --development Here are some screenshots

Heroku - Add new ssh key when re-install OS

Here is one more thing I have to take note when messing around with Heroku: SSH Key After installing a fresh copy of Xubuntu 13.10 (Saucy Salamander), I created a new virtualenv with all the requirement. I made some changes in the Django app. And, finally I intended to push the updates to Heroku: $ git push heroku master But, it said that I don't have permission. OK, I don't have the right ssh key on my new OS. So,  I fixed this by: 1. Generate new pair keys: $ ssh-keygen -t rsa 2. Add the new key to Heroku: $ heroku keys:add Done. Everything's back to normal. I can push code to Heroku again.

Django + Heroku - Local and Heroku database environement settings

I deployed a Django app in Heroku following these instructions: https://devcenter.heroku.com/articles/getting-started-with-django I could push source code to Heroku and the app ran successfully in that environment. But, when I run " ./manage syncdb " command locally, the console told me that I had an improperly DATABASE setting. I figured out that the setting line of Heroku is the problem: DATABASES['default'] =  dj_database_url.config() It overrode the default database setting of Django which was right above this line. Only Heroku will understand and use a specific setting for its environment. So, I used the following method to help Django to figure out the DB engine: DATABASES = {} import dj_database_url import socket if socket.gethostname() not in ['trinh-pc']:     DATABASES['default'] =  dj_database_url.config() else:     DATABASES['default'] =  dj_database_url.config(default='postgres://myuser:mypwd@localhost/mydb

Xubuntu - Fix empty sound indicator in 13.10

This morning, I installed Xubuntu 13.10 with the daily build image: http://cdimage.ubuntu.com/xubuntu/daily-live/current/ When everything finished, the sound indicator in the XFCE panel is empty, I mean...nothing there. No sound settings, no volumn bar. I searched on the launchpad and found that It is a bug: https://bugs.launchpad.net/ubuntu/+source/indicator-sound/+bug/1208204 So, here how to fix this: 1. Open the /usr/share/dbus-1/services/indicator-sound.service file: $ sudo nano /usr/share/dbus-1/services/indicator-sound.service 2. Change the exec line to the following: Exec=/usr/lib/indicator-sound-gtk2/indicator-sound-service

Xubuntu - How I ruined and saved my day at the same time

Last Saturday, When I was trying to install some packages in my laptop which is Xubuntu 13.04, I accidentally remove some python packages and... It's just so fast when I couldn't hold my finger from stopping pressing ENTER. "CTRL+ C", "CTRL+X" couldn't help me. I rebooted, the screen kept checking my laptop's battery condition... I couldn't log-in anymore. I googled around, and found some solutions which was useless in my case: * Solution 1: Boot to the recovery mode of Xubuntu, run the root shell, install GDM and used it as the default display manager instead of LightDM: # apt-get install gdm # dpkg-reconfig gdm # reboot => The GDM's log-in screen appear, I enter my account information => Xubuntu couldn't find any GNOME session. I switched back to lightdm. => Fail. * Solution 2:  Boot to the recovery mode of Xubuntu, select the fix broken packages line in the menu, restart => nothing changed. And then, I decide

Django Seminar #6

Image

Why did the chicken cross the road?

Image
This is one of the most popular questions and jokes in physics and philosophy:   WHY DID THE CHICKEN CROSS THE ROAD?   Plato: For the greater good. Karl Marx: It was a historical inevitability. Machiavelli: So that its subjects will view it with admiration, as a chicken which has the daring and courage to boldly cross the road, but also with fear, for whom among them has the strength to contend with such a paragon of avian virtue? In such a manner is the princely chicken's dominion maintained. Hippocrates: Because of an excess of light pink gooey stuff in its pancreas. Jacques Derrida: Any number of contending discourses may be discovered within the act of the chicken crossing the road, and each interpretation is equally valid as the authorial

XFDE - Panel alignment

Image
After I updated my XFDE desktop (Xubuntu 12.04), the main panel (top panel) had a weird alignment of items: And here is how I fixed it: 1. Open the Panel Preferences, select Items tab 2. Add a Separator before the Notification Area 3. Check the Expand checkbox:

Keep Calm and Change the World

Image

Django form - Add placeholder text to a form field

Image
Here is how I add placeholder text to a Django form field, for example: from django import forms class SearchForm(forms.Form): email = EmailField(widget=forms.TextInput(attrs={'placeholder': 'Email'})) In the template: {{ search_form.email }} It will be rendered as:

CSS - Change img tag's source image

To change source attribute of an img tag, use this CSS: <img id="myimg"> CSS: img#myimg {      content : url ( "/path/to/myimage.jpeg" ); } img#myimg:hover {     content:url("/path/to/otherimage.jpeg"); }

jQuery - Using bPopup plugin to display data in Django

I tried to display the data content in a form of popups, and I found the bPopup plugin of jQuery which is very useful and easy to use. So, I just hide the content and then add bPopup display to the click event of a button: mypage.html =========         {% for msg in mail_logs %} ...              <textarea readonly class="msgbody" id="msgbody-{{ msg.logid }}" value="" style="display:none;">{{ msg.body }}</textarea>                 <button class="showmsgbtn small button yellow" id="{{ msg.logid }}">Show Message</button> ...         {% endfor %} ... <script>     jQuery('.showmsgbtn').each(function(){         jQuery(this).click(function(){             btnid = jQuery(this).attr('id');             textareaid = 'msgbody-' + btnid;             jQuery('#' + textareaid).bPopup();         });     }); </script> ... References: bPopup's homep

Django - A simple search view

This is a simple search view I've just made for my Django app: + List all the email logs the first time the user visit the page with pagination + User search email logs by email address with pagination views.py: ====== def email_logs(request): selected_nav = "Events" request.session['selected_nav'] = 'events' all_ptc_events = get_all_active_events() current_selected_event_id = get_current_selected_event_id(request) staff = request.user time_range = datetime.now() - timedelta(days=30) email_logs = MessageLog.objects.filter(when_added__gte=time_range).order_by('-when_added') if request.method=='POST': search_form = EmailLogSearchForm(request.POST, request.FILES) if search_form.is_valid(): tmp = [] for el in email_logs: if el.to_addresses: if el.to_addresses[0]==search_form.cleaned_data['email']: tmp.append(el) email_logs = tmp else: search_form = EmailLogSearchForm()

Django - 5th Seminar

Image
Just a reminder for my tomorrow Django seminar: *  Topic : A crash course on  Django *  Attendants : students *  Date Time : 7:30AM October 5th, 2013 *  Venue : room 312 University of Information Technology, Linh Trung ward, Thu Duc Province, Ho Chi Minh City. (image's source:  http://tainted-archive.blogspot.com/2012/12/countdown-to-django-unchained_14.html )

Django - To display message from Message Framework correctly

To be able to display the messages from Django's Message Framework, you have to provide the request context in the return. For example: views.py: ====== def export(request): csv_file = get_csv_file(request) if type(csv_file).__name__=='file': response = HttpResponse(csv_file, mimetype='application/csv') response['Content-Disposition'] = 'attachment; filename=mycsv.csv' return response else: if excel_file==0: messages.add_message(request, messages.WARNING, 'No thing.') return redirect('myapp.views.showall') If the csv_file is not a file, a message will be added to the message framework, and the user will be redirected back to the showall view. In the showall view, we have to return the request context: views.py: ======= def showall (request): ...      return render_to_response('showall.html', locals(), context_instance=RequestContext(request)) showall.html: ========= {% if messages

Python - Convert csv to excel

This python snippet is useful to convert a csv file to excel file (.xlsx): * Install openpyxl module: $ pip install openpyxl excelutil.py ======== import csv from openpyxl import Workbook from openpyxl.cell import get_column_letter def csv_to_excel (csv_path, delimiter, delimiter_txt, excel_path, excel_title): csv_file = open(csv_path, 'rb') csv.register_dialect(delimiter_txt, delimiter=delimiter) reader = csv.reader(csv_file, dialect=delimiter_txt) wb = Workbook() ws = wb.worksheets[0] ws.title = excel_title for row_index, row in enumerate(reader): for column_index, cell in enumerate(row): column_letter = get_column_letter((column_index + 1)) ws.cell('%s%s'%(column_letter, (row_index + 1))).value = cell wb.save(filename = excel_path) csv_file.close() For example, I want to convert mycsv.csv to myexcel.xlsx: >>> from excelutils import csv_to_excel >>> cp = 'mycsv.csv' >>> de =

TogetherJS - Add collaboration features and tools to your website

Image
I've just tried out the TogetherJS, a javascript library that help me to add collaboration features and tools to my website, on my flask blog (dangtrinhnt.kd.io) It is pretty simple and awesome: ADD THE JAVASCRIPT SNIPPET Simply copy and paste the TogetherJS JavaScript snippet below into your site. <script src="https://togetherjs.com/togetherjs-min.js"></script> ADD THE HTML BUTTON After you've included the TogetherJS JavaScript snippet, copy and paste this anywhere onto your site! <button onclick="TogetherJS(this); return false;">Start TogetherJS</button> For more information about TogetherJS: https://togetherjs.com/

Flask + Gunicorn + Supervisor + Nginx

This morning, I deployed a Flask application in a Ubuntu 13.04 server with Nginx and Gunicorn. Here is the configuration: 0. My app code base (blog): /projects/blog/ 1. I created a shell script to run gunicorn: /projects/blog/blogguni.sh ======================== #!/bin/bash NUM_WORKERS=4 # user/group to run as ADDRESS=127.0.0.1:5000 cd /projects/blog /projects/.venv/blog/bin/gunicorn blog:app -w $NUM_WORKERS -b $ADDRESS 2. Supervisor configuration: /etc/supervisor/conf.d/blogguni.conf ========================== [program:blogguni] directory = /projects/blog/flaskr/ user = dangtrinhnt command = /projects/blog/blogguni.sh stdout_logfile = /projects/logs/supervisor_blog.log stderr_logfile = /projects/logs/supervisor_blog_error.log 3. Nginx configuration: /etc/nginx/sites-available/blog ==================== upstream blog {     server localhost:5000 fail_timeout=0; } server {     listen 80;     server_name dangtrinhnt.kd.io;     access_log /project

Chromium - Download a .txt file

Image
This is a buggy thing about Chromium. When I's trying to export a .txt file which is in csv format from my website, It displays the content instead of letting me download. I also tried to save the page (CTRL+S) but nothing happened. After a while, I found a solution, use the developer tool of Chromium : 1. Press F12 to display the developer tool 2. In the Resources tab, click Frames icon, and then Right Click to the file, choose Save As

edX-platform - Installing fullstack edX using a pre-built Vagrant image

Image
The edX team has been release the new Configuration, a project that help us to deploy and test edX easily, with code name  brioche . I'll try this and see how easy and improved it is. I will follow this wiki:  https://github.com/edx/configuration/wiki?utm_content=buffer0f89a&utm_source=buffer&utm_medium=twitter&utm_campaign=Buffer My computer: + Xubuntu 12.04LTS x86 64bit + CPU Intel core i3 + 4GB of RAM 1. Install requirements: + VirtualBox: 4.2.18 r88780 + Vagrant 1.3.3 2. Download vagrant image (the image's size is about 2.7GB, so I decided to download it manually): https : //s3.amazonaws.com/edx-static/vagrant-images/20130930-brioche-fullstack.box 3. Run vagrant init: # for the full edX stack (md5sum 6b26448fa92056d42f50d910c854a767) vagrant init edx 20130930-brioche-fullstack.box 4. Edit the created Vagrantfile, uncomment and modify these following lines: config.vm.box_url = "20130930-brioche-fullstack.box"

PowerSchool - Get data in a custom page (HTML)

PowerSchool is a huge student information system which is used worldwide in International Schools. It's not open-source but It provides us a lot of features. One of them is pages customization. + In a custom page, you can make a SQL query to get the data. For example: to get all the teachers (staffstatus=1) of Elementary School (schoolid=3) which are still active (status=1), and order the result by last name: ~[tlist_sql;     SELECT DISTINCT t.Last_Name, t.First_Name     FROM Users t, SchoolStaff ss     WHERE t.DCID=ss.Users_DCID         AND ss.StaffStatus=1         AND ss.Status=1         AND ss.SchoolID=3     ORDER BY lower(t.Last_Name) ]     <p>~(t.Last_Name), ~(t.First_Name)</p> [/tlist_sql] (PowerSchool v7.8.2) PowerSchool's official website:  http://www.pearsonschoolsystems.com/products/powerschool/